Planting, mulching and pesky birds!

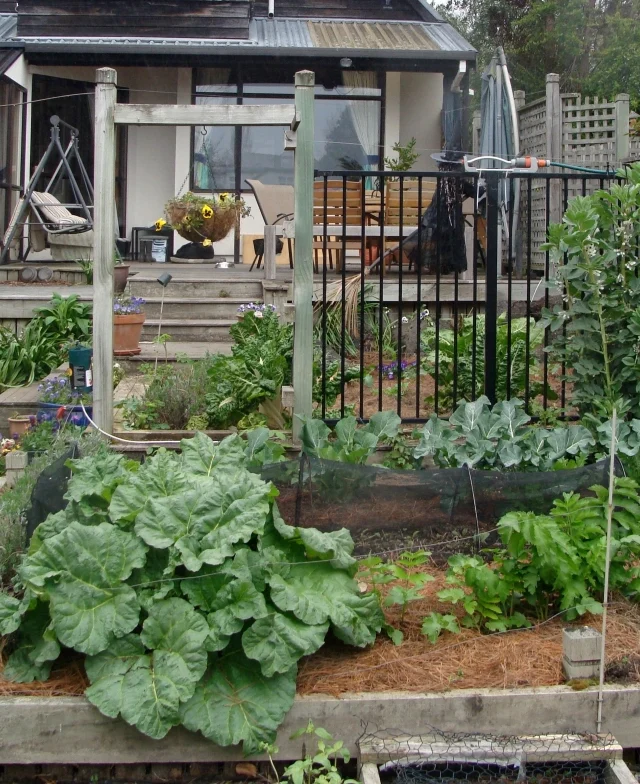
Winter is well and truly over, judging by all the activity in the greenhouse! While all this growing has been taking place, the vegetable garden has been given the complete works. I have completely covered it with blood and bone which has been lightly forked in and watered, and then covered it with compost. All this has been done in readiness for the arrival of the semi-hardy seedlings which have been hardening off after their tropical beginnings in the greenhouse. Lettuce (mesclun, and my fave pick-as-you-go lettuce called ‘Canasta’), cauliflower, broccoli, parsnips and beetroot have now all been planted out. Beans and an early sowing of parsnips, which were planted before the winter set in, are almost ready to harvest. The raspberries, which were cut down to the ground, have sprung back with a vengeance, so it looks as though there will be spares once again for neighbours and friends. Strawberries are flowering, and the fruit trees have burst out in blossom seemingly over night. It’s now time to mulch, mulch and mulch.

Pine needle mulch – organic, plentiful, sustainable and free
People seem to have a preference for different mulches depending what they grow, their soil and how accessible their garden is. This is where, in my opinion, you can’t do better than pine needles. They are so easy to collect, carry and spread, and although they do get moved about by the wind and birds, and perhaps they get tangled up in the plants, they are worth any frustrations you might have been told about. I swear by them now, and would not revert to pea straw or any other mulch. We have gathered up over 50 big bags of pine needles, and I still want more. I can manage them myself, which is not to be said for pine nuggets. Pea straw has been my previous favourite mulch, but it gets mouldy and dusty and often starts sprouting.

I have to say I’m a complete pine needle convert.
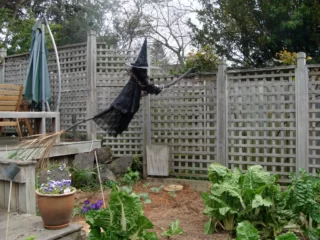
Scarecrow with attitude!

We love attracting birds to the garden, but I despair when I see my tiny precious vegetables absolutely ravaged to nothingness. I use netting covers, but I don’t have enough to cover everything in the garden, so I have made a scarecrow with a difference.

She is swinging on a wire, so when the wind blows she really looks like she’s going to take off. So far so good as far as the birds go as my cauliflowers and broccoli remain unmunched.

Growing 0 Comment

Grow some yummy food!

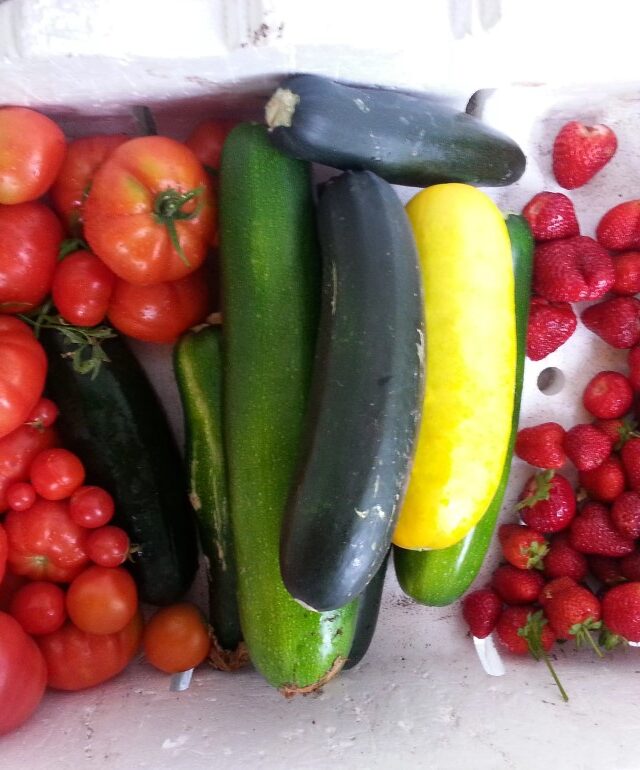
You don’t need to live on a farm to grow your own food.  We have a quarter acre section, and manage to grow heaps of different fruit and vegetables.  If you don’t have much land, you can still grow stuff in pots, troughs and bags.  It’s all about having the enthusiasm and the desire to get down and dirty.

It’s good for you knowing where your food has come from and where it’s been, good for the planet (transport etc) and just an awesome all round hobby with so many benefits.

There are plenty of websites which demonstrate how to grow healthy fruit and vegetables including how to make your own compost, what is a weed and what’s not, so there’s no excuse for not doing it!

If you are starting out, it’s probably best to start small. Even if it’s got too much and you let it go one year, leaving it can only enrich the soil (that’s my theory) giving it a rest, and then you can start again the following year.  Anything can happen to stop you gardening;  work, babies, travel, boring stuff like that, but there’s always next year!

Growing 0 Comment

Realising I’m in the minority

It’s difficult not to feel that what I’m doing doesn’t figure in this world of hedonistic consumerism, but I’m going to keep biking, growing food, composting, buying stuff 2nd hand, and obliterating plastic from my life.

Coming across as holier than thou isn’t good either. I need to strike a balance between preaching, and wanting to change people’s attitudes to help them understand that they can make a difference.

No one likes (or listens to) a ‘tree-hugging greenie’.

Not sure if that’s what I am or not, though.

Contemplation 0 Comment

Quince Jelly

What you’ll need (for six jars):

  • 12 Quinces
  • 1.5 kilos sugar
  • 1 lemon
  • 12 jars and lids
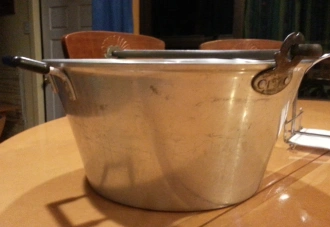
  • Preserving pan

What to do:

  1. Wash the quinces to get rid of the fuzz
  2. Cut up into small pieces.  Put everything – fruit, pips & core into a preserving pan.
  3. Add the peeled skin of a lemon and its juice
  4. Cover with water, and bring to the boil.
  5. Boil until soft – maybe 30 – 40 mins
  6. Mash with potato masher or hand held blender until you just have pulp
  7. Pour it all into a muslin bag
  8. Hang it somewhere safe
  9. Let drip for at least 24 hours into a bowl DO NOT SQUEEZE OR IT WILL BE CLOUDY
  10. Prepare your jars & lids – wash and dry thoroughly
  11. After you think that there’s nothing left to drip, weigh the juice.
  12. Pour the juice into a preserving pan and add the same amount of sugar [If you don’t have a preserving pan that’s ok, but a preserving pan is better because it concentrates down more quickly with the wider top of the pot.]
  13. Bring to the boil stirring constantly.  Never leave it!
  14. Simmer the jelly away gently for about 30 mins, stirring occasionally.
  15. Place your washed and dried jars in the oven in a roasting pan on 100 degrees to sterilize.  They will need 20 minutes at least. Put the lids into a pan of water to boil.
  16. Test for set-ness by taking a spoon that you have left in the freezer, and dipping it into the jelly.  If the jelly stays and sets on the spoon it is ready.  If not, simmer it some more,  and re-check.
  17. You can leave a saucer in the freezer and put in some jelly and leave for a second.  Push it with your finger.  If it crinkles it is ready!
  18. When you are happy it’s ready, take it off the heat to stop simmering. There will be some foamy scum on the top which you will need to remove.  I use a big spoon or a cup to scoop it off the top.  Try not to disturb it too much or mix it into the jelly.  You might have to sacrifice some jelly at this stage, but it’s worth it.\
  19. Get out your jars and bottle your lovely jelly. If you don’t have lids you can buy these cellophane covers that come with rubber bands.  These are ok.  Put them in a saucer of water as you need them and they will stretch over the jar and seal nicely.
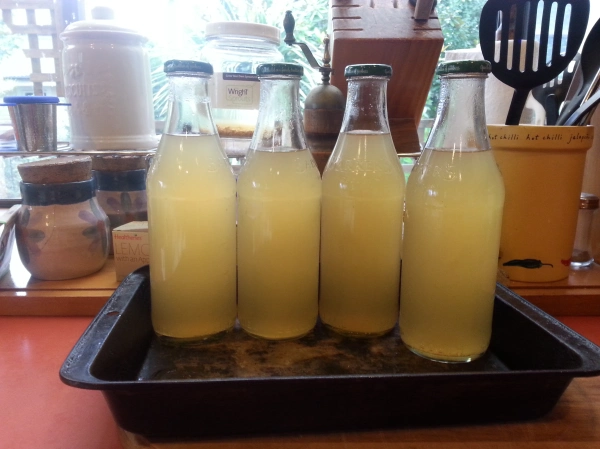
All afternoon you will hear the ping and pop of the jar lids sucking down and sealing.  So incredibly satisfying!

Making 0 Comment

Spiced Ginger Pear Cordial

We had a really fantastic crop of pears this season, and I didn’t want to waste a single one.  They are of the hard and crunchy type – completely organic and some wearing the ravages of codlin moth and the dreaded pit infliction.  The pits are like little stones that have been pushed into the skin, and everyone has to be cut out before bottling.  Such a pain.

Finding what to do with this bounteous crop that wasn’t going to be too much work was quite tricky.  Lots of recipes say how to leave the pears in a bucket and wait for it to turn into cider; or how to add vodka to it to make liqueur …  that all sounded great, but a lot of work.

Bottling them seemed obvious, but I got a bit fed up after a few jars.  The peeling, cutting out the pits, washing, packing, making the sugar syrup … so I looked for something a bit easier.

Pear jelly looked pretty simple.  It’s very posh jelly.  It is meant to be cut and placed on a tray with the blue vein cheese.  Still quite a lot of work, though.

Then I thought of the easiest thing in the world to do with all my pears!  I decided to make this absolutely to die for cordial!  So easy, hardly any mess!

Here’s what you need!

  • Pears
  • Crushed ginger
  • Handful of whole cloves
  • Sugar

Here’s what you do!

  1. Cut the pears up quite small – cores, skins, codlin bugs, pits – the works, and throw them into your preserving pan.  Cover with water.  Bring to the boil, and stir every now and then.  Cook until the pears are soft, and blitz with the hand-held blender.  You will have a big pan of mush.  Put it all into your muslin bag, and leave to drip for 24 hours.
  2. When you are ready, weigh or measure the juice, and chuck it back into the preserving pan. I also threw in a handful of whole cloves and two heaped teaspoons of crushed ginger.  Bring to the boil and then add some sugar.  I used a third of the amount of sugar, but you could use less, as mine is quite sweet.  Stir this constantly while it’s coming to the boil. Simmer for 10 – 15 minutes.
  3. Meanwhile, prepare your bottles by washing, drying and sterilising in the oven for at least 20 minutes on 100 degrees Celsius. Boil the lids in a pan of water for the same amount of time.
  4. When you are ready, sieve the cordial and bottle up using a funnel. The joy will come in about thirty minutes when you hear those little lids pinging as the seals set, and you will know that all your hard work will have been worth it.
  5. Make it up one to five with soda water – you will be so amazed with the refreshing taste.  Kind of like ginger beer without the exploding bottles in your closet and without the waiting.

You will  never buy store-bought cordial with all those additives and preservatives again, and that’s got to be a good thing.

POST SCRIPT: I have made a batch with no sugar. I have yet to try it, but for all of you ‘no-sugar’ people, it’s worth a try as pears are so sweet anyway.

Making 0 Comment

Potting Up

Potting-up can be a bit of a trauma for plantsSulky Plant

If you take a look under the tray and you see roots poking through, it’s time to transfer the seedlings into the ground, or, if it’s still not warm enough, into bigger pots which you will then pop back in the green-house or under the cloche.  My cucumbers and zucchinis were really complaining, and as they like the garden to be a bit warmer than it is at the moment, I’ll hold off putting them into the garden just yet.  If I keep them in the smaller seed trays they would grow stunted or leggy and would always struggle to produce the goods, so it’s worthwhile giving them the room they need.

Here are my happier seedlings resting in the 20151007_130619shade after their traumatic potting-up experience.  Don’t laugh!  The plants really do get stressed during this process, so they are having a quiet little rest in the shade up out of the way of my pesky chooks who would love to munch on them.  They’ve been put in clean pots, with new potting mix, and been given a quiet spray of water.  At the end of the day I’ll put them in back in the greenhouse.

It’s a similar story with coriander seedlings.  I’ve heard that coriander is tricky to grow, but I’ve not really had that much trouble.  Here’s what I do.

Coriander seeds sprout better straight onto potting mix rather than on paper towels, as long as they are in a warm place, so once you have your seed tray organised (clean and with good seed-raising mix) sprinkle on a few seeds. 20151007_132703Next, water the seeds really gently using a spray nozzle.  This pushes the seeds down into the medium without you having to do this manually.  You don’t need to cover them with soil, just water gently every day.  They usually take about two weeks to do anything so don’t panic if other things sprout before your coriander has shown any sign of life.

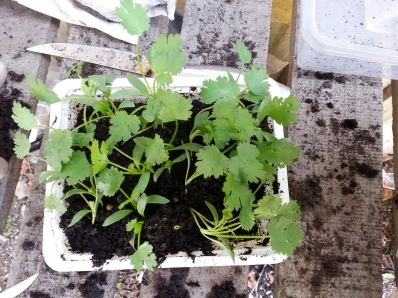
20151007_130722After about six weeks, your coriander might look like this, and the roots are probably poking out the bottom.  Time to pot these little guys up! But here’s the thing that is so easy to forget to do at this stage.  So that you keep a constant supply of yummy coriander, it’s also time to get some more seeds going, so do that before you start the potting up operation.

Once your next lot of seeds have been sewn, prepare your pot for the seedlings, (clean and with good potting mix) or maybe you are going to transfer each plant into its own pot. Coriander likes lots of root room, so don’t try and put coriander into a squibby wee pot or it will sulk and not perform. I’m going to put all the plants into a bigger pot where they will continue to grow together but will still have enough space.

Some gardeners advise using a knife to cut the root system, and something else to ease out the plant, but what I do is this.  It seems to work anyway!  Turn the whole seed tray upside down into your hand, trying not to crush any of the plants as you tip them out.  The mixed-up root system will hold the seedlings in the shape of the seed tray, so flip the whole thing back up the right way and place it carefully on a flat surface.  Break off one or two seedlings from the tangled root system and put carefully into the new pot, (starting from the middle if you are using a big pot).20151007_131811

Keep separating seedlings and planting them, ensuring that they are well supported in the new mix.  Water gently and leave in the shade for them to recover.  Put them back into a warm space at the end of the day.  My coriander likes to be in morning sun and shaded in the hottest part of the day.  Keep an eye on it everyday for moisture –  If you let it dry out, it will bolt (turn to seed).

After another couple of weeks you should be able to use your lovely fresh coriander in your Thai cooking.  Yummo.

Growing 0 Comment

Planting seedlings

It’s been four days since the seeds were placed in the mini hot house, and most have germinated well.  It’s planting out time!  I’ve found it easier to plant all of the seeds at the same time even though they are at different stages of growth.  shootsSome have really long roots and no tops, and other have well-developed tops and tiny roots.  Some have just a minuscule wee development poking out of the seed.  Leaving them too long on the paper towel has proved disastrous, so it’s best to plant them at the first sign of growth.

Tweezers 1To do this, I strongly advise that you buy a good quality seed-raising mix,  and I really stress that it’s important not skimp on this, as the wee seedlings need all the help they can get at this stage.

You’ll also need some sort of seed tray, which you can get from friends I’m sure.  I used to re-use seed trays without washing them out, but I’ve found a better success rate occurs if you put them in a large bucket of water with a bit of bleach.  This gives them a really good clean.  Then squirt them off with the hose.  All of these things help to get that seedling off to a good start.

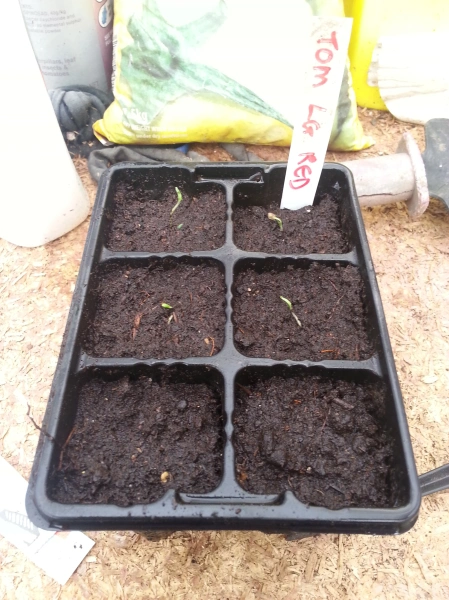
Fill the seed tray with the potting mix and press down.  Make a hole in the potting mix with something pointy like a stick.  Gently ease the seedling out using tweezers on the leaves only, taking care not to break the root if it has burrowed into the paper towel. You might need to wet the paper towel to dissolve it a bit to do this.

Tweezers

Place the root down the hole as far as it will go enabling the leaves to sit as close to the top of the potting mix.  Gently pack the mix around the seedling.  For the seedlings with a tiny bit of growth, just place on top of the potting mix and cover with a little sprinkling of the mix.  When you have transferred all of the seedlings, water gently.

Labelled seedlings

Remember to label!  You can re-use old labels or make some by cutting up ice cream containers.

Place in a warm position in good light, and leave to grow. You can put the whole thing into a clear plastic bag that is propped up with a couple of coat hangers for extra warmth, but this is where an old aquarium can be reused. You will have your own little glasshouse.  I have placed some old glass slats across the top of mine that I can open and close depending on the weather. I’ve also put another reptile mat inside the aquarium for when I’m growing stuff in cold weather.  It works a treat.

Check for soil dampness every day and remember to water gently.  In no time at all your seedlings will be ready to face the big wide world.

Growing 0 Comment

Sprout some seeds – (on the cheap)

You can buy seedlings from the nursery, but they are quite expensive.  You don’t want to be put off if things don’t work out in your first year.  Thinking about the waste of money doesn’t help you stay enthusiastic.  A good way to start of growing your own food from seed is to buy one of these off e-bay.  Reptile Mat

It’s a reptile warming mat. You can see them here  Free shipping too! They are under $10 (NZ) and absolutely perfect.  A propagation kit or seed-raising mat can be up to $200, but this is just as good. Set it up somewhere with good light, and then grab a couple of take-away containers with lids.  Turn them upside down, and get a couple of paper towels.

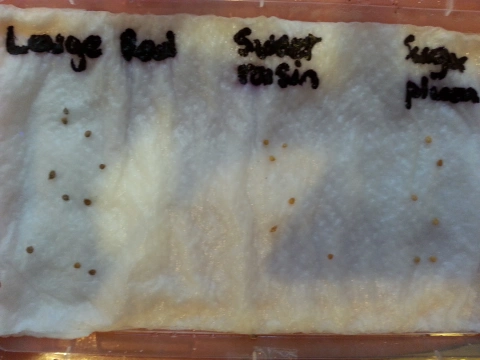
LabelsWrite on the paper towel what seeds you are planting, and then line the lid of the container with the towels.  (This example is of three different tomato seeds). Wet the paper towels, sprinkle a few seeds onto them, and pop the base on, which is now the lid.  Place on the mat, and leave to sprout!  Check them every day.  They should remain moist, but may need a top up.  If they do, tip water under a corner of the towel so as not to disturb the seedlings. Just enough to moisten the paper towels.

When the seedlings have sprouted, they need to be transferred into good seed-raising mix with tweezers, and left somewhere warm to grow.  I’ll show you how to do this next time.

Meanwhile, get those seeds germinating!

Growing 0 Comment