Potting-up can be a bit of a trauma for plants
If you take a look under the tray and you see roots poking through, it’s time to transfer the seedlings into the ground, or, if it’s still not warm enough, into bigger pots which you will then pop back in the green-house or under the cloche. My cucumbers and zucchinis were really complaining, and as they like the garden to be a bit warmer than it is at the moment, I’ll hold off putting them into the garden just yet. If I keep them in the smaller seed trays they would grow stunted or leggy and would always struggle to produce the goods, so it’s worthwhile giving them the room they need.
Here are my happier seedlings resting in the  shade after their traumatic potting-up experience. Don’t laugh! The plants really do get stressed during this process, so they are having a quiet little rest in the shade up out of the way of my pesky chooks who would love to munch on them. They’ve been put in clean pots, with new potting mix, and been given a quiet spray of water. At the end of the day I’ll put them in back in the greenhouse.
It’s a similar story with coriander seedlings. I’ve heard that coriander is tricky to grow, but I’ve not really had that much trouble. Here’s what I do.
Coriander seeds sprout better straight onto potting mix rather than on paper towels, as long as they are in a warm place, so once you have your seed tray organised (clean and with good seed-raising mix) sprinkle on a few seeds.  Next, water the seeds really gently using a spray nozzle. This pushes the seeds down into the medium without you having to do this manually. You don’t need to cover them with soil, just water gently every day. They usually take about two weeks to do anything so don’t panic if other things sprout before your coriander has shown any sign of life.
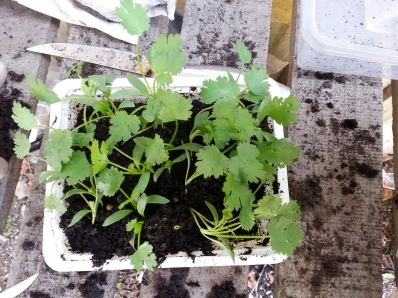
 After about six weeks, your coriander might look like this, and the roots are probably poking out the bottom. Time to pot these little guys up! But here’s the thing that is so easy to forget to do at this stage. So that you keep a constant supply of yummy coriander, it’s also time to get some more seeds going, so do that before you start the potting up operation.
Once your next lot of seeds have been sewn, prepare your pot for the seedlings, (clean and with good potting mix) or maybe you are going to transfer each plant into its own pot. Coriander likes lots of root room, so don’t try and put coriander into a squibby wee pot or it will sulk and not perform. I’m going to put all the plants into a bigger pot where they will continue to grow together but will still have enough space.
Some gardeners advise using a knife to cut the root system, and something else to ease out the plant, but what I do is this. It seems to work anyway! Turn the whole seed tray upside down into your hand, trying not to crush any of the plants as you tip them out. The mixed-up root system will hold the seedlings in the shape of the seed tray, so flip the whole thing back up the right way and place it carefully on a flat surface. Break off one or two seedlings from the tangled root system and put carefully into the new pot, (starting from the middle if you are using a big pot).
Keep separating seedlings and planting them, ensuring that they are well supported in the new mix. Water gently and leave in the shade for them to recover. Put them back into a warm space at the end of the day. My coriander likes to be in morning sun and shaded in the hottest part of the day. Keep an eye on it everyday for moisture – If you let it dry out, it will bolt (turn to seed).
After another couple of weeks you should be able to use your lovely fresh coriander in your Thai cooking. Yummo.