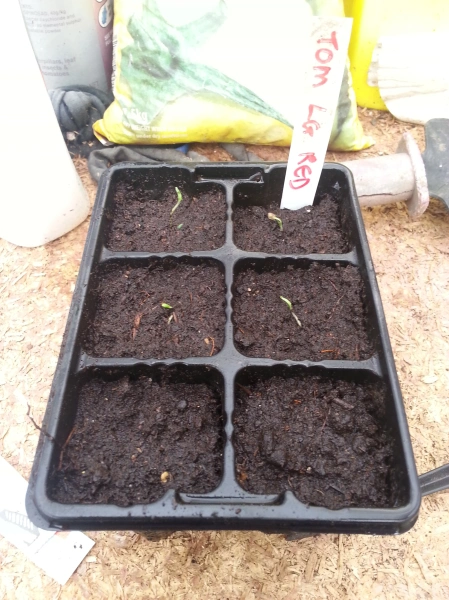
It’s been four days since the seeds were placed in the mini hot house, and most have germinated well. It’s planting out time! I’ve found it easier to plant all of the seeds at the same time even though they are at different stages of growth.  Some have really long roots and no tops, and other have well-developed tops and tiny roots. Some have just a minuscule wee development poking out of the seed. Leaving them too long on the paper towel has proved disastrous, so it’s best to plant them at the first sign of growth.
 To do this, I strongly advise that you buy a good quality seed-raising mix, and I really stress that it’s important not skimp on this, as the wee seedlings need all the help they can get at this stage.
You’ll also need some sort of seed tray, which you can get from friends I’m sure. I used to re-use seed trays without washing them out, but I’ve found a better success rate occurs if you put them in a large bucket of water with a bit of bleach. This gives them a really good clean. Then squirt them off with the hose. All of these things help to get that seedling off to a good start.
Fill the seed tray with the potting mix and press down. Make a hole in the potting mix with something pointy like a stick. Gently ease the seedling out using tweezers on the leaves only, taking care not to break the root if it has burrowed into the paper towel. You might need to wet the paper towel to dissolve it a bit to do this.

Place the root down the hole as far as it will go enabling the leaves to sit as close to the top of the potting mix. Gently pack the mix around the seedling. For the seedlings with a tiny bit of growth, just place on top of the potting mix and cover with a little sprinkling of the mix. When you have transferred all of the seedlings, water gently.

Remember to label! You can re-use old labels or make some by cutting up ice cream containers.
Place in a warm position in good light, and leave to grow. You can put the whole thing into a clear plastic bag that is propped up with a couple of coat hangers for extra warmth, but this is where an old aquarium can be reused. You will have your own little glasshouse. I have placed some old glass slats across the top of mine that I can open and close depending on the weather. I’ve also put another reptile mat inside the aquarium for when I’m growing stuff in cold weather. It works a treat.
Check for soil dampness every day and remember to water gently. In no time at all your seedlings will be ready to face the big wide world.